How to Turn an Old iPhone into the Perfect First Phone for Your Child
Buying your child their first phone isn't as straightforward as it used to be.
Many parents want their child to be able to call home, send messages and use Maps if they get lost. But handing over a fully-featured smartphone can feel like opening the door to social media, web browsing and endless distractions before they're ready.
What many people don't realise is that Apple has already built a solution into every modern iPhone.
It's called Assistive Access.
Although Apple designed it as an accessibility feature, it can also transform an old iPhone into a simple, easy-to-use phone that's ideal for younger children.
Why not just buy a basic phone?
Traditional feature phones can certainly make calls and send text messages.
The problem is that they often lack many of the features parents actually want:
- GPS navigation
- Find My location sharing
- A decent camera
- Emergency contacts
- Familiar iPhone interface
- FaceTime with family
An old iPhone can do all of those things.
The challenge is removing everything you don't want.
Meet Assistive Access
Assistive Access is hidden away inside the Accessibility settings on every recent iPhone.
When enabled, it replaces the normal Home Screen with a much simpler interface.
Instead of dozens of apps, colourful widgets and endless notifications, your child only sees the apps you've chosen.
For example, you might allow only:
- Phone
- Messages
- Maps
- Camera
- Photos
- Music
Everything else simply disappears.
There is no Safari icon.
No App Store.
No games.
No social media.
To your child, the iPhone feels like it was designed to do just those few things.
What you'll need
Before you start, you'll need:
- An iPhone running a recent version of iOS
- Your child's Apple ID (or create one using Family Sharing)
- About 10 minutes to set everything up
Older iPhones such as the iPhone 11, iPhone 12 and iPhone 13 are perfect candidates, especially if they've been sitting unused in a drawer.
Step 1 — Open Accessibility
Open Settings.
Scroll down and tap Accessibility.
Near the bottom of the page you'll find Assistive Access.
Tap it, and then tap Set Up Assistive Access.
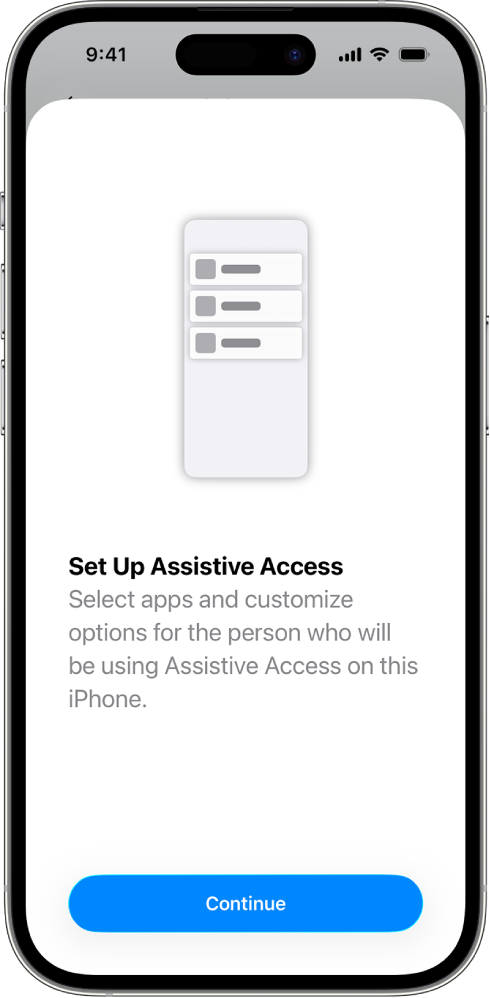
Step 2 — Start the setup
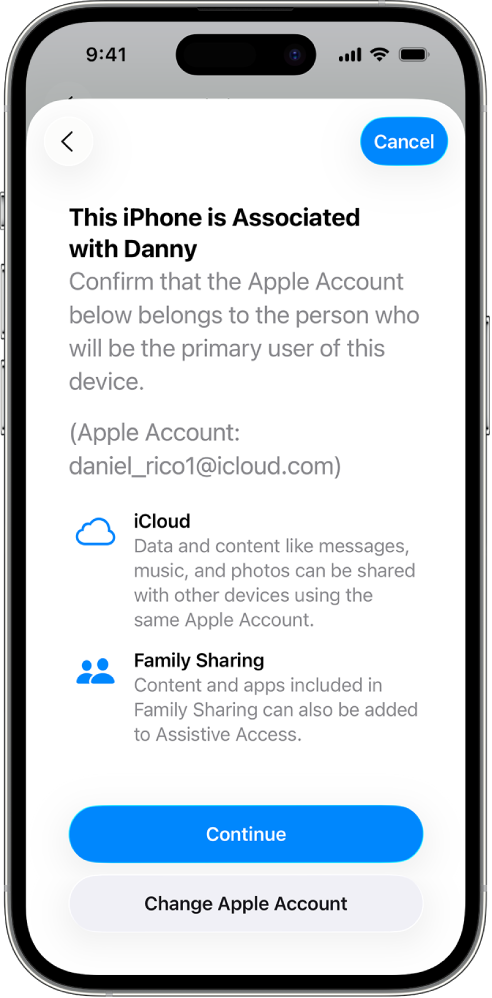
Apple will ask whose iPhone this is.
If you're handing the phone to your child permanently, choose their Apple Account.
This ensures their contacts, messages and location sharing all work correctly.
Step 3 — Choose the layout
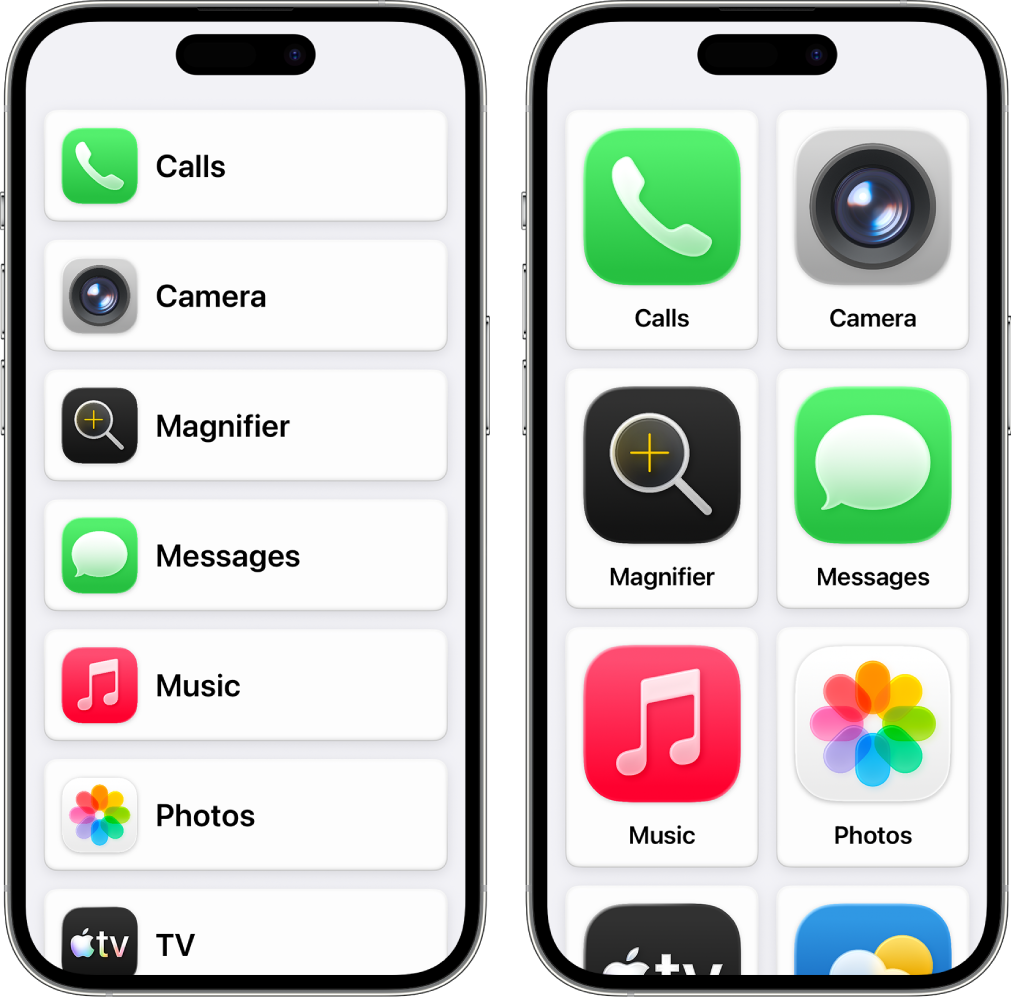
Apple offers two layouts.
Grid
Large colourful icons.
Ideal for younger children.
Rows
A simple list.
Often preferred by older users or people who want an even cleaner interface.
Step 4 — Choose which apps appear
This is where Assistive Access becomes really useful.
Instead of removing apps one by one, you simply choose the ones you want.
For a first phone we'd recommend:
- ✅ Phone
- ✅ Messages
- ✅ Maps
- ✅ Camera
- ✅ Photos
- ✅ Music
Everything else stays hidden.
You can always add more later.
Step 5 — Configure Phone and Messages
Apple even lets you decide who your child can communicate with.
You can choose:
- Everyone
- Existing contacts
- Favourite contacts only
For younger children, limiting calls and messages to family members can be a useful extra safeguard.
Step 6 — Create the passcode
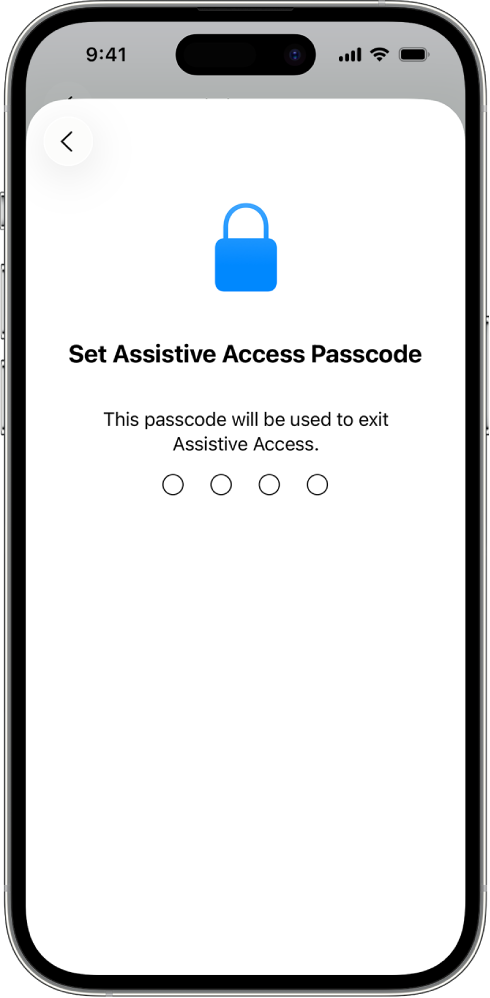
Assistive Access has its own passcode.
This is different from the normal iPhone unlock code.
Your child can continue using the phone normally, but if they try to leave Assistive Access they won't be able to without entering this separate code.
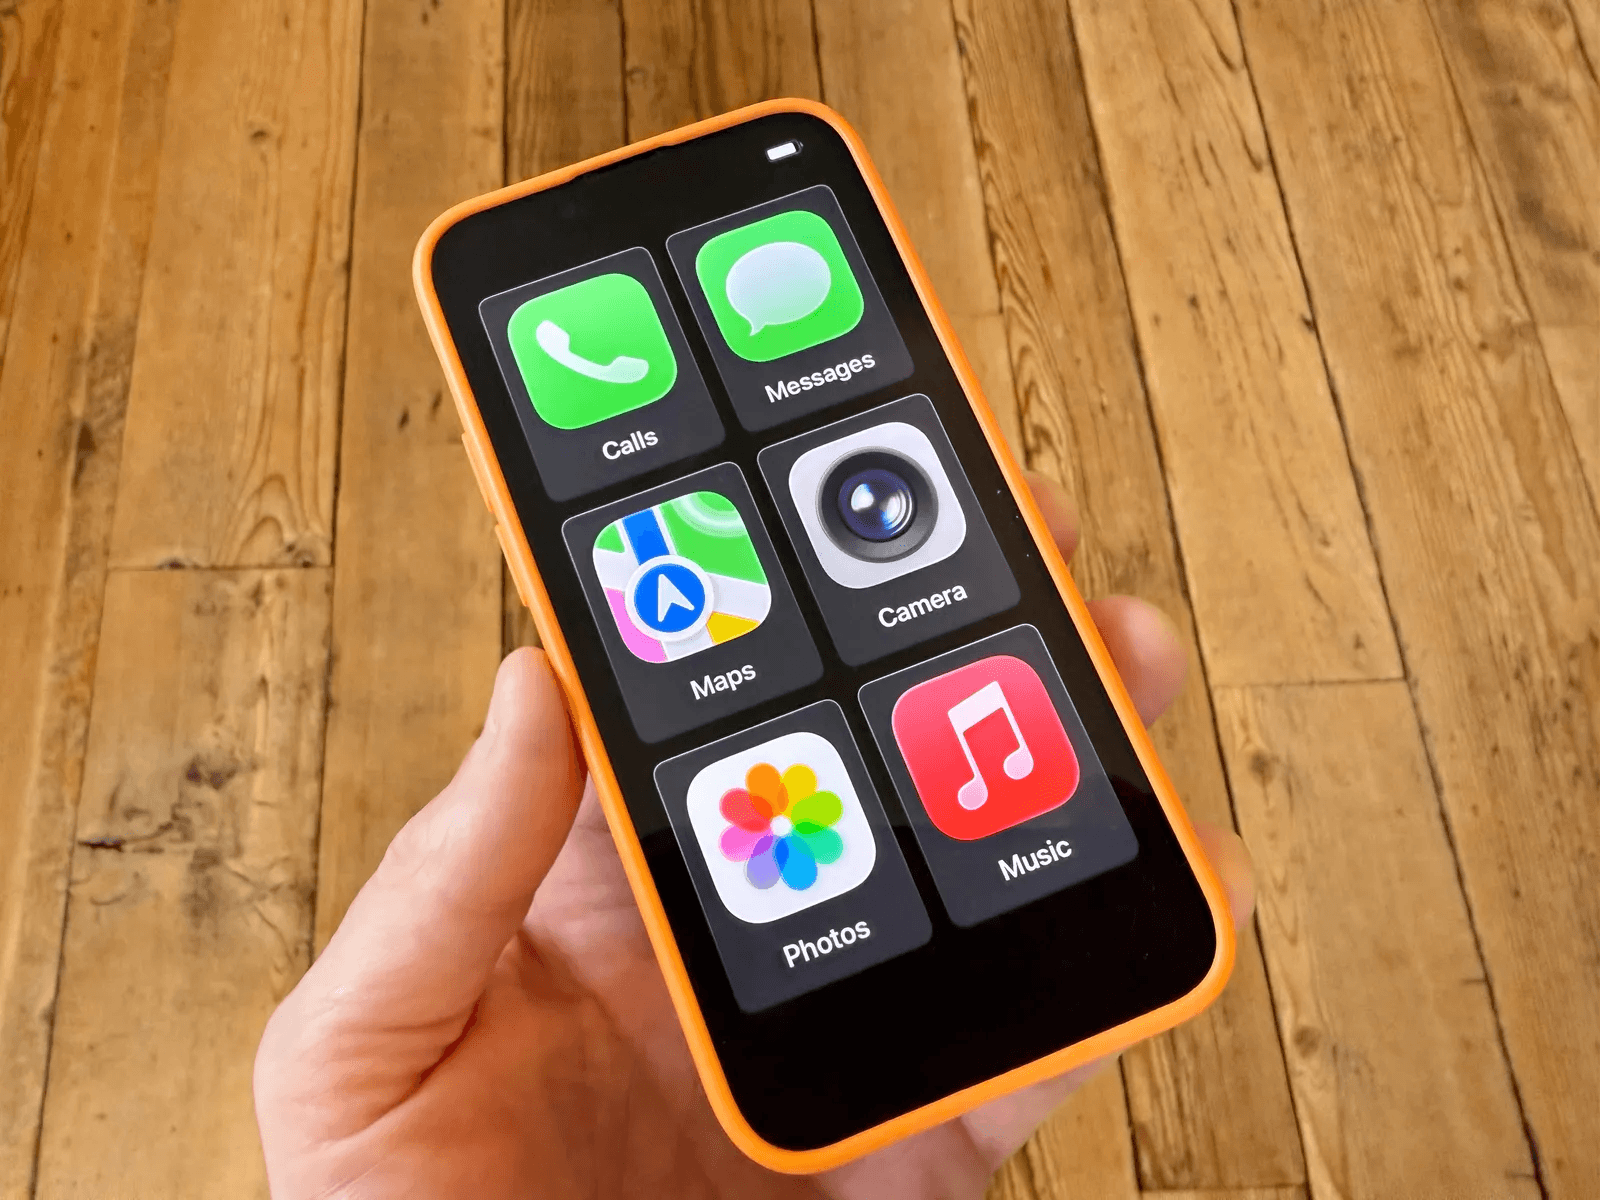
What the finished phone looks like
Once setup is complete, the difference is remarkable.
Instead of pages of apps, your child sees only a handful of large buttons.
Calls are easier.
Messages are simpler.
Maps is easy to find.
There's very little to distract them.
It's almost like using a purpose-built children's phone, except it's still a proper iPhone underneath.
Can children get around it?
For most younger children, probably not.
Leaving Assistive Access requires:
- Triple-clicking the Side Button
- Choosing "Exit Assistive Access"
- Entering the Assistive Access passcode
As long as you keep that passcode private, the restrictions are surprisingly robust.
That said, no parental control system is completely foolproof. As children grow older they'll naturally become more technically capable, so it's worth checking the phone occasionally and reviewing which apps you've allowed.
Should you also use Screen Time?
Yes.
Assistive Access and Screen Time do different jobs.
Assistive Access controls what your child can use.
Screen Time controls how they use it.
Together they provide a much more complete solution than either feature on its own.
Is an old iPhone good enough?
Absolutely.
In fact, it's probably one of the best uses for an older iPhone.
Before handing it over, we'd recommend:
- Installing the latest version of iOS
- Checking the battery health
- Replacing a worn battery if necessary
- Making sure the screen isn't cracked
- Removing your own Apple ID
- Setting up Family Sharing
- Testing Find My before your child starts using it
A five-year-old iPhone can still make an excellent first phone if it's in good condition.
Final thoughts
Parents often assume their only choices are a basic phone or a fully-featured smartphone.
Assistive Access offers something in between.
It lets children benefit from useful features like calls, messages, maps and location sharing without exposing them to everything else that comes with a modern smartphone.
If you've got an older iPhone tucked away in a drawer, it's well worth giving it a second life.
And if that phone needs a new battery or a screen repair before you pass it on, that's something we can help with too.